
Are you running out of space on your PC?
Running out of storage can be annoying and it’s often the culprit of computer issues. It could also be the reason your PC is slower than a sloth, taking its sweet time to load things and making it impossible to get work done.
If you’re experiencing poor performance on Windows 10 or you just don’t have space on your PC to download new apps or software, we recommend cleaning up all your computer files and deleting stuff you don’t need.
It may first be helpful to check your disk space to see what’s taking up the most space.
Here’s how to view your disk space:
Step 1: Click on the Start button and then select Settings.
Step 2: Click on System and then select Storage.
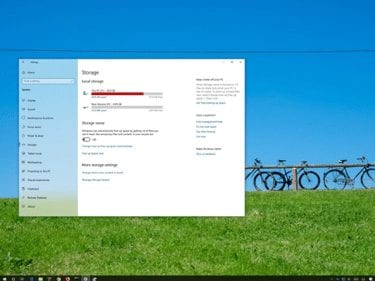
Now you can view your storage breakdown. In order to increase your storage space here, we recommend performing 3 easy tasks. These tasks will quickly help you free up space on Windows 10 by cleaning up unnecessary files and apps you no longer need.
- Take out the trash!
You may not realize it, but whenever you delete a file, it doesn’t actually disappear into thin air. On Windows 10, it gets stored in your Recycle Bin where it sits for a long time taking up space.
Here’s how to empty your Recycle Bin:
Step 1: Click on the Start button.
Step 2: In the search bar, type in “Recycle Bin” and then select the top result.
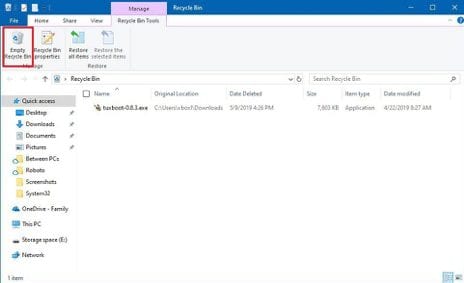
Step 3: Navigate to the Recycle Bin Tools tab and then click on Empty Recycle Bin. When prompted, click the Yes button. See the picture below for reference.
This oftentimes gives your computer’s storage more elbow room. You can always check your disk space again by going back into your storage settings to see if it made a big difference.
- Use Storage Sense on Windows 10
Windows 10 makes it easy to delete junk files from your system drive in order to free up disk space. While emptying your Recycle Bin is a great manual task, when you enable the Storage Sense tool, it will monitor and free up space on your PC automatically.
Storage Sense helps you:
- Delete files that have been inside your Recycle Bin for longer than 30 days
- Delete unnecessary temporary files
- Clean up your downloads folder
- Delete locally saved OneDrive files if you haven’t used them in the last 30 days (they will still be accessible online, they just won’t take up storage on your computer)
To enable Storage Sense, follow these steps:
Step 1: Click on the Start button and then go to Settings.
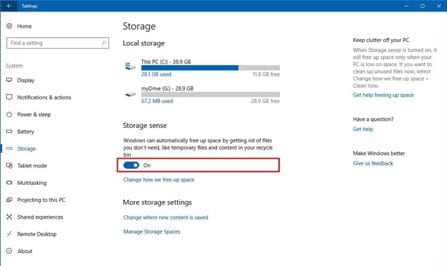
Step 2: Click on System and then select Storage.
Step 3: Navigate to the Storage sense section and toggle the switch On. This will now automatically delete most of your junk files (it may not clean up all of them).
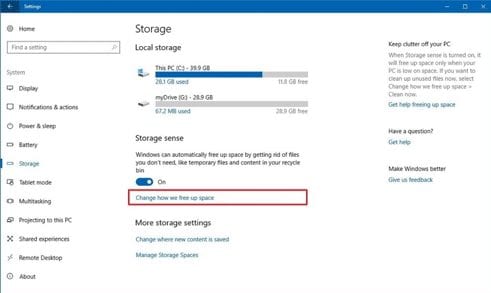
Step 4: If you want to specify which files you want to be deleted, click on the Change how we free up space link (if you are running the Windows 10 May 2019 update, the link will likely say Configure Storage Sense or run it now).
Step 5: Under the section called Temporary Files, check the items you wish to delete.
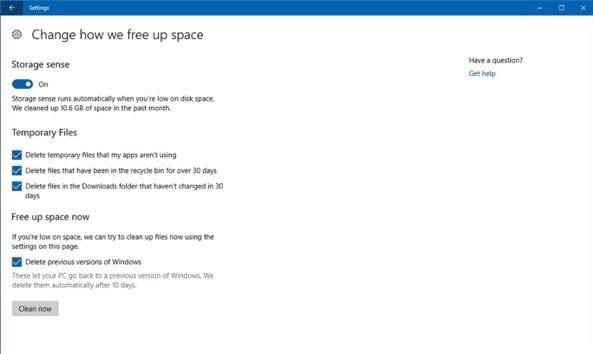
*on the latest update of Windows 10, use the Recycle Bin drop-down menu to specify how to clear deleted files (for example, you can delete files after 1 day instead of the default 30 days). Similarly, use the Downloads drop-down menu to specify how to clean up files you downloaded from the internet.
Step 6: Under the section Free up space now, you also have the option to delete an older installation of Windows 10. This option appears only if you installed a new version of the computer system. If this is the case, go ahead and delete the previous installation because you don’t need it.
Step 7: Now click on the button Clean now to implement your changes.
- Save Space by Making OneDrive Files On-Demand
On later updates of Windows 10, the Storage sense tool does have the option to make unused OneDrive content available online only. It essentially deletes the locally saved file on your computer in order to increase storage space. But since it’s saved on OneDrive, you can always access the document at any point online.
Here’s how to take advantage of this neat feature:
Step 1: Navigate to Storage space again (Start à Settings à System à Storage à Storage Sense à Change how we free up space) and then locate the section called Locally available cloud content.
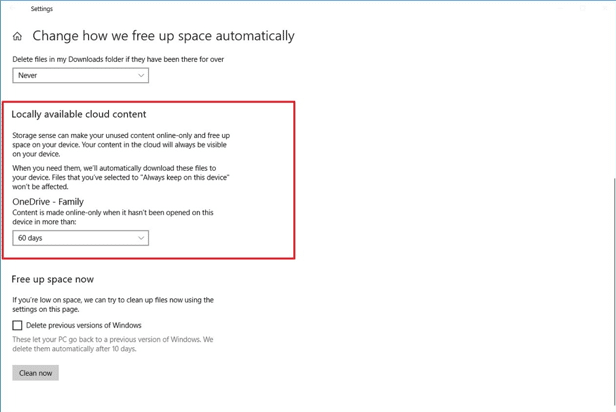
Step 2: Use the drop-down menu in this section to specify when OneDrive content should be made online-only. Options available include:
- Never
- 1 day
- 14 days
- 30 days
- 60 days
That’s it!
However, if your computer is NOT giving you this option, you will need to manually enable what is called OneDrive Files On-Demand. Again, this is a great way to free up disk space. It gives you access to all your files online without needing to download them.
To enable OneDrive Files On-Demand, follow these steps:
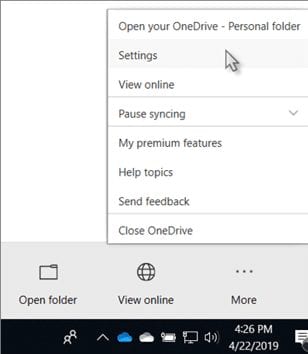
Step 1: Click on the white or blue cloud icon located in your taskbar to open OneDrive (you will only see the blue cloud if you have OneDrive for Business).
Note that if the cloud is grey, you will need to login with your synced Microsoft account. If you do not see a cloud icon, then OneDrive is not running. To open the app, simply click on your Start button and search for “OneDrive.” Select the top result.
![]()
Step 2: Select More then click on Settings.
Step 3: On the Settings tab, select the Save space and download files as you use them box and click OK.
Once this is complete, you can start using Files On-Demand to move files to the OneDrive folder and make them available online-only to free up space.
That’s all there is to it! 3 steps and you should definitely see an increase in your storage space. If you still need a little extra wiggle room, it may want to consider uninstalling nonessential apps and unnecessary files from your computer. Check out our previous Tech Tip on How to Get Rid of Useless Software on Windows 10.