

Windows 11: Virtual Desktops – Tech Tip for August 17, 2021
As we continue our look at new and enhanced features in Windows 11, it’s time to take a deeper look at Virtual Desktops. Windows 11’s Virtual Desktops were created with the idea that users have one computer that they use at different places and for different groups of tasks, for example business and home.
Create and Access Virtual Desktops
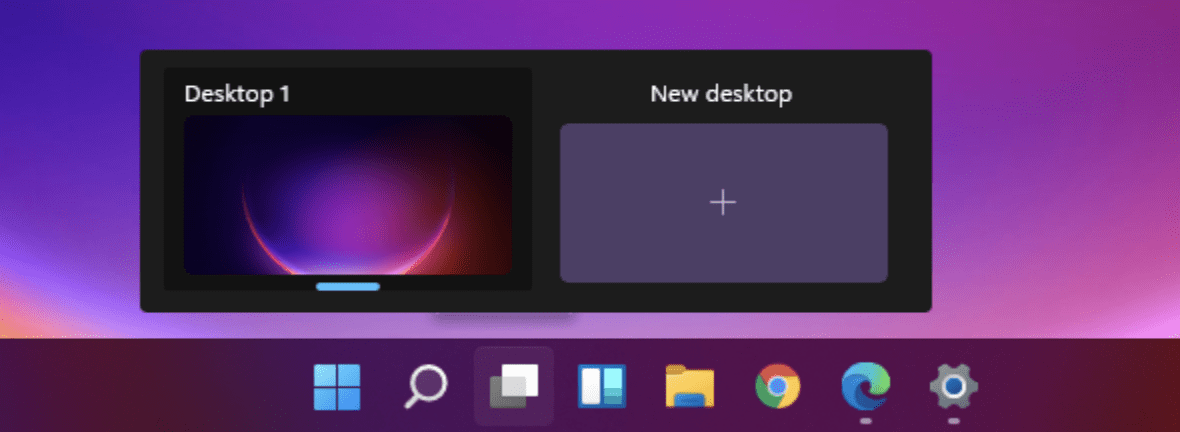
To access virtual desktops, hover the cursor over the Task View icon, the currently active desktop called Desktop 1 is displayed. To create a virtual desktop, you should click the + icon next to Desktop 1.
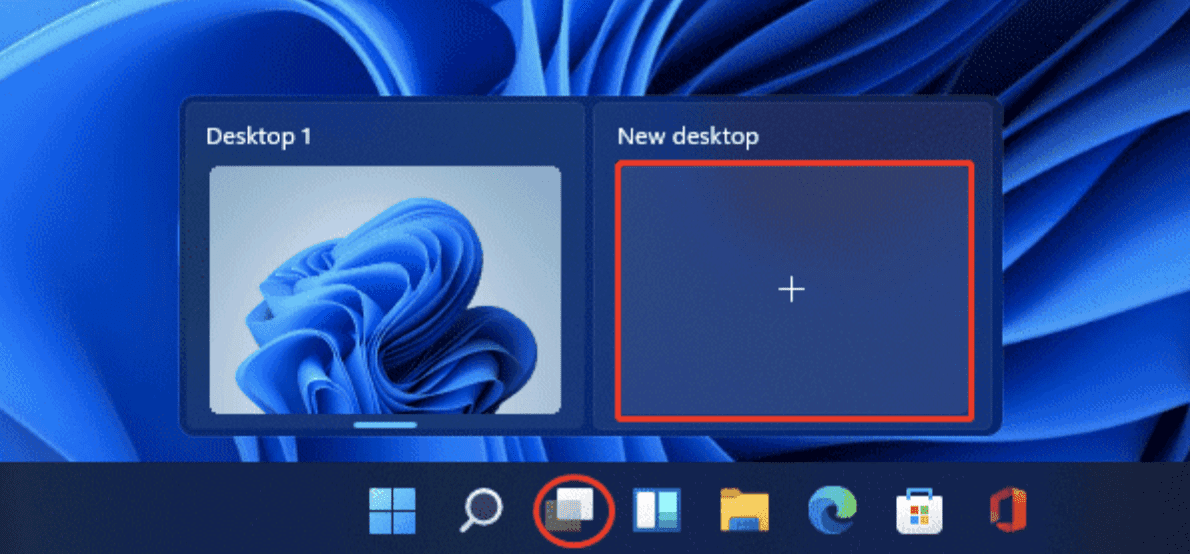
Tip: By default, the Task View button is added to Taskbar but sometimes it is hidden. In this case, you need to enable this button. Just right-click the Windows 11 Taskbar, choose Taskbar settings and then switch the toggle of Task View to On.
Switch Windows 11 Virtual Desktop
There are a couple of ways to switch between your multiple desktops:
- Via Task View: Put the mouse cursor on this Task View button and choose the virtual desktop you want to access.
- Via keyboard shortcut: Press the Win + Tab keys on the keyboard and select the virtual desktop you want to go to. If you want to use keyboard shortcuts to quickly switch between desktops, press Win + Ctrl + Left (switch to the one on the left) or Win + Ctrl + Right (switch to the one on the right).
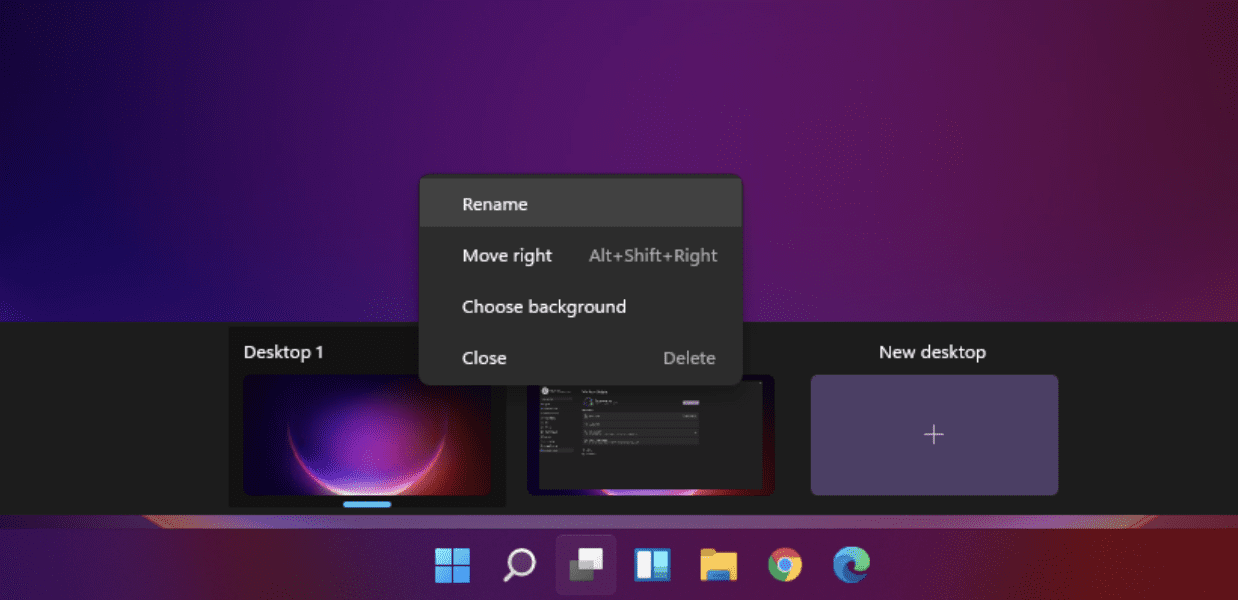
Rename the Virtual Desktops
You can rename your virtual desktop. Here’s How:
1. Hover over the Task View icon.
2. Then, right-click on the virtual desktop and click Rename to name it as per your liking.
Want to learn more about Windows 11? Contact us.